Showing posts with label blue. Show all posts

Thursday, February 13, 2014

(Early) Spring Balcony


Pin It

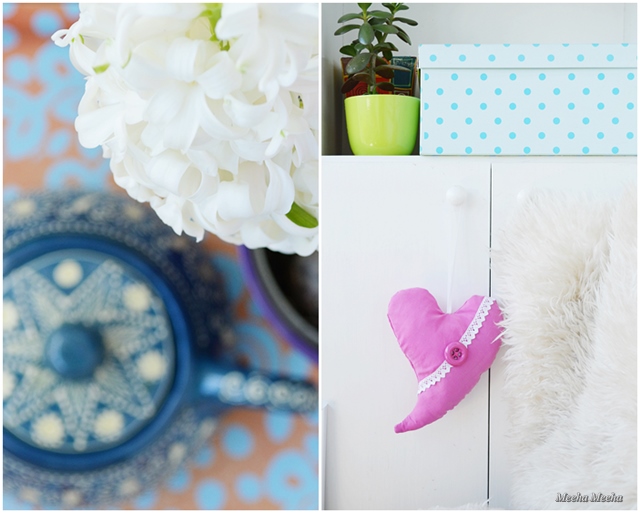
Thank God for warm (and sometimes sunny) weather! Who would have thought that we could enjoy a cup of tea on the small balcony, in February?! So, the days went from bloody freezing to mild and I prepared a cozy corner on the balcony. We've got sheep skin to keep us warm, a well equipped serving tray, potted plants and fresh flowers :)


The pride of my spring balcony are the "green babies" who survived a cold Romanian winter. These plants, mostly succulents, spider plants and ferns, are already trained to spend a few months on the chilly balcony. The space is enclosed with glass, but it's not heated and not many plants can make it til spring. 


I've already daydreamed about enjoying a cup of mint tea with my boyfriend :) Valentine's Day is tomorrow and the balcony is the perfect place to spend the morning together. That's why there is a whimsical heart hanging there. I love the way it looks, with the dusty pink silk and the delicate lace. But the hearts means so much more to me, because it's a handmade present from lovely Lisa. Hop over to her blog Lisa Sol to see her talent in action!


The colors make me smile and it feels like Spring already! Even the hyacinths come in three colors! I just used whatever was handy, not thinking about the chromatic at all. That's why you can see a lovely mix of greens, blues and pinks against the white background of the balcony. Oh, and a little bit of yellow, too!


Ladies, you are invited to take a break with me on the balcony. It is warm and fresh in here. It smells of hyacinths and tea and honey. The teapot is made by local artisans and the green poster is a simple DIY from origami paper. If it gets dark, we'll light the candle and the Moroccan lamp on the shelf! 


Friday, December 6, 2013

Printable Bauble Gift Tags


Pin It

Dear friends, here is a little gift for those of you in need of a breath of fresh air (and free gift tags). I'm sharing some care-free tags for some last minute casual gift wrapping. If you're overwhelmed by the invasion of free gift tags featuring cute Christmas trees, Santa, Rudolf and so on, or if you need a shift from tradition, you can use my alternative gift tags, based of my own photos from the blog. The tags are free to download here. 


My free gift tags are less conventional, but they still fit into the Christmas feel. I've made 10 different designs, each one shaped like a bauble ornament. So basically they can be printed and hung in the Christmas tree, why not?!  The tags come in different colors, so they can be assorted to many kids of wrapping paper.


For a neat look, wrap your gifts in solid color paper (or craft paper, I bet it would look terrific!) and hang the bauble gift tags by a piece of yarn in a matching color. I went the extra mile and wrapped my gifts in ombre shades of mint. The vivid colors of the gift tags will stand out from the crowd :)


Or you can go crazy and choose a busy patterned wrapping paper and some neon string. Hang a bunch of gift tags on the same present, instead of just one. It looks like fun!


If you're curious to discover from which of my blog posts I've taken the photos, take a peak here:
1. Orange and purple flowers from the Autumn Flower Ball tutorial
2. The inside of a crystal Chalk Paint Vase
3. The inside of a blue vase from my Sand, Sea and Sky shooting
4. Apple shaped gravel from What To Do?
5. Red peony petals from Don't Play With Your Food
6. A snowflake made of mini pegs in Winter Valentine
7. Hyacinth bulbs from How To Force Bulbs For Winter
8. Painted toothpics in the process of making Mad Hatter Cupcake Toppers
9. 3. The inside of a yellow vase, also from my Sand, Sea and Sky shooting
10. A snowflake of paper boats from my Origami Garland


 If you have any questions, just let me know. This printable is provided for personal, non-commercial use only. Enjoy!

Linking up to these lovely parties.
And some of them require a backlink in the actual post, so here they are:
http://adiamondinthestuff.blogspot.ro/   http://www.myuncommonsliceofsuburbia.com/   http://www.blackberryvine.blogspot.ro/   http://www.cedarhill-ranch.com/   http://diycraftyprojects.com
http://www.sew-much-ado.com/   http://www.elizabethandco.blogspot.ro/   http://thelifeofjenniferdawn.blogspot.ro/

Monday, November 25, 2013

Random Happy Home


Pin It

Hello, friends! I want to welcome you with a snap shot from my kitchen counter. We've got a pot of rose-hip (plus a zucchini for dinner). The rose-hip grows in the wild, is full of thorns and makes great tea, full of vitamin C. 


A colorful view of my desk, in complementary shades of red and green. This Prague poster never ceases to amaze me. If I close my eyes half-way, I can picture myself lazing on the balcony with a cup of coffee. The poster has been sitting above my desk for the last four years, but it works every time!


I've still got the brown bottle centerpiece and the wonderful dried herbs in subdued colors. Actually, on the balcony there is a box full of these wild herbs left over from this project, so I'm thinking of using them for another project. Maybe a Christmas wreath?


Retro decor in the home office. A pale blue wooden stool, topped with a matching gingham hat box and a vintage mushroom lamp. The cracked herringbone floors, my DIY faux wallpaper and Anais the cat complete the picture.


Yet another night view of the origami Igloo Village (my Advent Calendar for 2013). I wonder if I could place little tea lights inside the igloos in a fire-proof way. Or maybe try with a string of Christmas lights?


Last but not least, a selfie from work. Once more, I am dressed like the Christmas elf! This has to stop :))


Wednesday, November 20, 2013

DIY Advent Calendar: Igloo Village!


Pin It

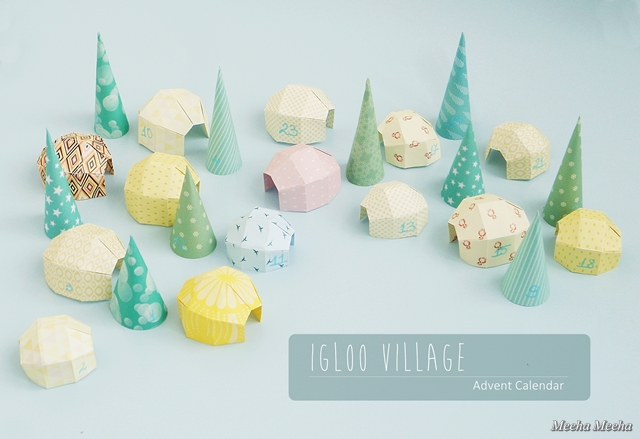
This year I thought I'd kill two birds with one stone with this DIY project: a Christmas village AND an Advent calendar. My first ideas were quite traditional, like making gingerbread houses. But after giving it a little thought, I decided to make something new and exciting: the Igloo Village! It's perfect for Christmas, since the igloos are always snowed in. And the round shapes of the ice homes are simply adorable :)


The Igloo Village is always in the mood for winter fun. It is made of origami paper, so it's light, small and easy to move around the home. Also, if it survives the holidays and the curiosity of my cats, it could be stored away in a small box, until next year. In theory, igloos are white - but mine are colorful, because when the sun shines across the endless sea of ice, the snow sparkles in soft tones of yellow, blue and even pink!


For the countdown to Christmas, I've made 24 little units: 14 origami igloos (in 2 sizes) and 10 paper trees (also in 2 sizes). Each item has its own number written on the side. The village display is random, so you need to find your next number, which adds a little to the excitement. 


The Igloo village Advent calendar also doubles as a treasure hunt. Hide little treats, small messages, tree decorations or tiny toys under each house and tree. This way, the joy of Christmas gets sweeter every day! For me, it was toys all the way, as you can see in the image above. You can also use the paper igloos and trees to decorate the Christmas tree, if you hang them by a thread :)


Last but not least, I must tell you that the Igloo village looks great at night time, too! Since it is already pitch black each evening when I come back from work, it is a pleasure to take a peek at my Advent calendar, sitting quietly under the soft glow of a small lamp! 


If you haven't got an Advent Calendar for this season yet, it's easy to replicate this one. I'm sharing the tutorial below, split in 2 parts: the igloos and the cone trees. It took me 3 hours to make the entire village, but prepare to spend a little more time if you're a novice in paper crafts in general and origami in particular.


Origami igloo tutorial
For this project you will need:
- origami igloo template: I used this great one from the talented Francesco Guarnieri.
- patterned square origami paper. I worked with two sizes: 8.5 x 8.5 cm square sheets and 10 x 10 cm square sheets.
- pencil and ruler for marking where you need to fold the paper.


How to make the origami igloo:
1. Lay the paper square on the blank side. Mark where you need to fold the paper in 5.
2. Start folding the paper in 5 equal strips horizontally, then in 4 equal strips vertically.
3. The folded paper should look like a grid.
4. Fold the extreme strips inside.
5. Fold again and make a little crease just like in the template.
6. Repeat another two times. The paper should look like this. Mark all the valley and mountain folds, for easy final assembling.
7. This is the tricky part: get the valley folds in one hand and flip it on the inside.
8. Carefully press the paper folds in order to make the final shape.
9. Repeat steps 7 and 8 on the other side of the igloo and you're done!


Paper trees tutorial
For this project you will need:
- cone tree template: I used these ones but in a smaller scale.
- patterned origami paper. The small trees fit into 8.5 x 8.5 cm square sheets and the tall ones fit into 10 x 10 cm square sheets.
- pencil and ruler for drawing the template outline and for marking where you need to fold the paper.
- scissors and glue stick.


How to make the paper tree:
1. Print the template on cardboard and cut it out. I didn't make the round base, just the cone. Lay the template on the blank side of the origami paper. Draw the outline. Be careful not to move the template during the process.
2. Cut out the origami paper, following the outline.
3. Fold the paper along the marked line.
4. Fold again on the other side. Apply glue on the patterned folded strip.
5. Turn the paper on the good side and put the edges together to make the cone shape. The long edge must overlap the glued strip. Gently press with your fingers until the glue sets in.
6. Enjoy the paper trees and the entire Igloo village!


Tuesday, October 29, 2013

What To Do?


Pin It

What am I to do, dear ladies, when I've got this adorable little gourd and can't decorate with it?!

I love its organic shape, with the long neck and the teardrop bottom. I'm crazy about the white and green colors and its bumpy texture. In fact, I got this gourd from 300 km away from here (that's like 190 US miles), cruising through four villages until I saw the object of my desire for sale - at a farmer's house. But it's the irregular shape that's causing me all these problems, because this gourd will not sit upright. 


So what do you think I should do with this gourd which only sits on one side, horizontally? Perhaps you need a little hint? Well, look carefully in the arrangement, because the answer is already there. I can't reveal if it's the nail polish, the felt balls or the gravel... I've already thought of a solution to my decor problem, so come back tomorrow to see how I've "convinced" the gourd to stand up! 


Friday, May 24, 2013

Random Happy Home


Pin It

First of all (and second! and third!) I have to thank you, friends, for the love and support! I was overwhelmed! I honestly didn't expect anyone to be aware of my post, after such a long absence! But it felt... heavenly! After reading all your comments, I made a promise to myself to post as much as I can from now on, in spite of the challenge of my second job. So let me start with my newest acquisition, pictured above: a granny lamp that all my friends hate and that I simply adore :)) 


Many of your comments mentioned the colors of my flat. As you know, I don't think at all about color, because to me, color has always been there, like... well, like the air! I just take it for granted. So this is a light and dark study of my small balcony, full of color, seen through the door from the living room. Complete with a checkered blanket under Madalina Andronic's lovely painting :)


I just took this photo this morning. Yesterday I had a terrible day at work and I was feeling miserable. My boyfriend knew that and he surprised me in the evening with the last pink peonies he could find in the market place. He was sad because the peonies looked kinda "plucked", so I shot them in the morning in order to show to the world their true beauty. The right bottom one was just a bud yesterday and it flourished over night! 


And since this is MY blog and I do whatever I want to, let me add my love Anais to the party. I'm afraid I am still terribly in love with her, after all these years! All you pet lovers have to understand me, right? Just as she was napping in the warm morning light, all curled up on the Moroccan leather pouf, completely ignoring the rest of the world... I felt my heart shrinking with tenderness.


Last but not least, a fuzzy pic from the bedroom. I took it on a rainy day, just before I removed the plants from their winter shelter. I am pleased to report that we've had hot weather for the last month, so all my "silent green pets" reside happily on the balcony. Except those who cannot stand too much sun, which are still on the window sill in the bedroom. So long, friends, I've missed you more than I was aware of and it's great to share this with you again!

Monday, April 22, 2013

Light Blue Something


Pin It

I remember a sweet band from the 90's, called Deep Blue Something. So I'm posting about... light blue something. I'm in the mood for summer and this pale blue is a great reminder of the joys ahead of us. In the first pic, there's one of my beachy photo frames from last year, and below some origami paper boats, also made last year.


Then, there's a little Russian doll and her best friend, the little pouch I got as a present from Lisa...


Also I could think of these beautiful cardboard eggs made from blue pattern paper


My simple blue vases from the dollar store, so pretty with their textured glass


And most of all, I'm glad that I don't have to see this icicle against the blue sky, for a while!


LinkWithin

Related Posts Plugin for WordPress, Blogger...