Tuesday, May 29, 2012

Handmade notebook


Pin It

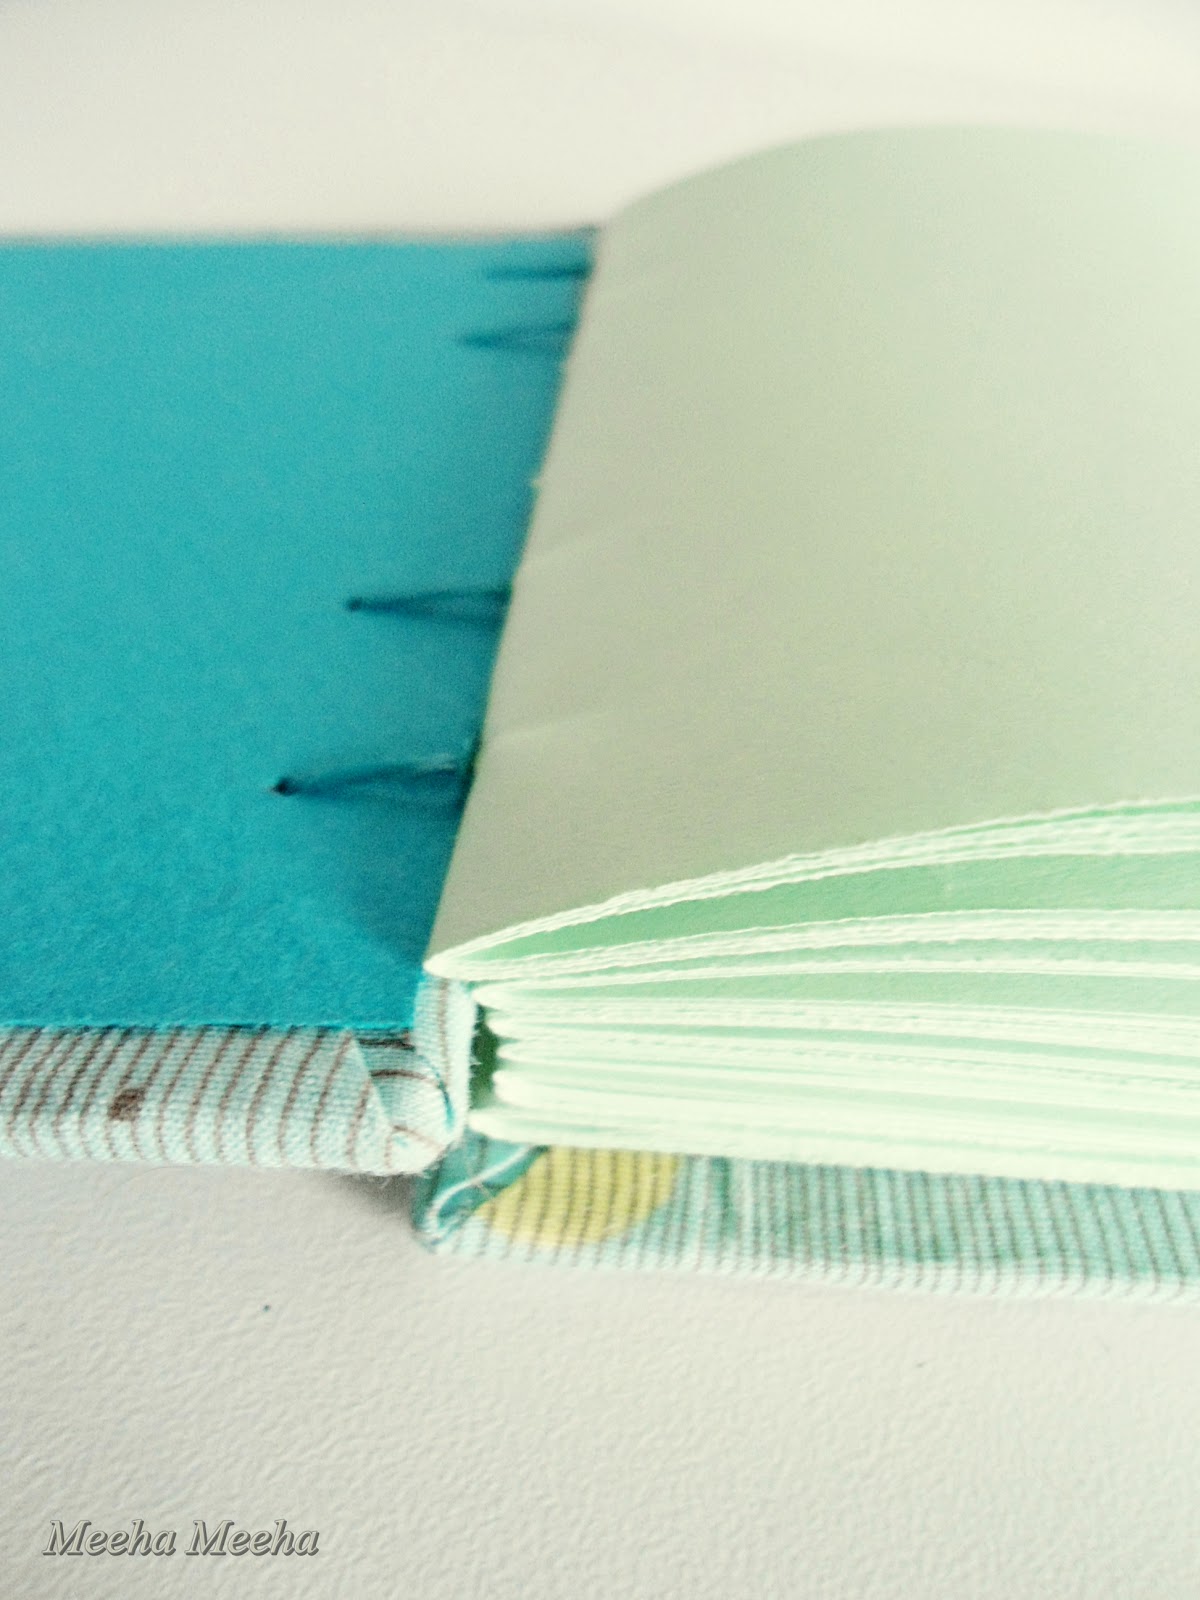
So I made my first notebook ever. For my friend Ana (and she taught me how to actually do it). I hope she will write and draw tons of stuff on it and that by Christmas, the whole notebook will be completed. For what is a notebook without the notes and doodles inside it, to call your own?
And a little update: you can find many more handmade notebooks on our Etsy shop L'ateliera!


To make this present, I used colored paper (mint for the notebook body and turquoise for the inside covers - Ana's favorite colors) and an old skirt with a lovely dotted - psychedelic pattern. A touch of happy yellow never hurt anybody, but don't stare too long at the fine lines or you will get a mighty headache!


Quick tutorial:
1. You will need: a piece of fabric in a playful pattern, hard cardboard, colored lightweight paper, liner, cutter, scissors, glue, waxy string, a needle and an awl for piercing everything.
2. Cut the strips of paper twice as big as the final size you want for your finished notebook. Fold every paper in half along the sewing line (where the stitches will be) and make 7 sheet sets.
3. Pierce every set  of paper, using a guiding template (to make sure the wholes are even on each set of paper).
4. Cut the covers and carefully glue the fabric on the outside. Tuck the corners in.
5. Glue the inside cover over the fabric corners and pierce the covers, using the same template.
6. Sew every set of paper - this is impossible to explain properly, but there are plenty of web tutorials out there. To be honest, it was Ana who taught me how to make the stitches... because handmade notebooks are her hobby!


Hip Hip Hooray! I've just been featured at Clean & Scentsible, Social Salutations, JAQS Studio, Simple Home LifeHomeworkAlderberry HillIt's So Very CheriCherished Bliss, Get Outta My Head Please Cabin Fevered GemMy Uncommon Slice Of Suburbia and Petite Hermine and also got pinned on Romance On A Dime. Thank you so much for the feature, it gives me the power for more projects :)
Photobucket            
homework       Craft & Tell  you are talking too much 
My Uncommon Slice of Suburbia   RomanceOnADime.com  

Today, on my way to work


Pin It

And the smell took me back to a place on Innocence.

Monday, May 28, 2012

Pink and Green


Pin It

Ana brought me pink tulips.
These are the last tulips of this Spring. Of this year, in fact.


They lost their rich color and waxy glows. They turned to dusky shades of light purple. Their lovely crown shape weathered slowly, hour by hour, until it became a splendid star. You can't even tell that these used to be tulips, anymore. 
Messengers of the Spring sun!


The beautiful pink stars are sitting on my kitchen counter, next to my green plates and other dishes of the day. Pink and green, my favorite color combo for now, bathing in the afternoon light. Sweet and tasty as an apple, exotic as a hot May morning, mysterious as a whisper and tender as a summer cloud.


I love shooting this kind of random, impromptu domestic scenes, where nothing has been staged. Beauty smiles at me with the promise of a brief moment of perfection.

Monday, May 21, 2012

Archaeology


Pin It

I've been blogging for four and a half months and my pictures for the blog are starting to pile up. In about a year or two, there will be a bunch of Meeha Meeha photos. I realize this is real-time content when I upload it, but in a while it transforms into archives.
A virtual testimony.
Many years from now, will someone dig-up these fragments of our lives? How would these pics look in the eyes of our survivors - 500 years from now? 
Will they understand how we lived? Or will they guess some traits, based on some scarce photos?


Saturday, May 19, 2012

Red Peonies


Pin It

Peonies take me back in time. One look at them and I'm in my grandma's yard in the country side. Sweet summer breaks and little donuts on a silver tray! Trips to the enchanted well under the oldest and biggest nut tree in the whole world! Fighting bees on the porch and... red peonies :)


This summer's first red peonies came to live in a clear water pitcher on my kitchen table. I love how they make a nice color dot against the black and white decor... and near my black and white cat :-))  I'm looking forward to a loooong summer, full of wonderful blossoms which will fill my heart with joy and ease my mind. Welcome Summer!

Tuesday, May 15, 2012

The Houses Behind The Forsythia

This post is long overdue.
But hey - better late than never!

So I will start with a lovely old house which hides its charming ogival front door and its little entry steps behind a yellow bursting Forsythia.


Take a walk on the wild side with this flaming bush. It overtakes the iron fence and the barb wire, as well! It guards a shy little house, painted in powdery pink.


This house is undergoing some serious reconstruction, judging by the piles of reclaimed wood stored in the front yard. It makes a shabby background for the impetuous yellow flowers.


And this is my favorite! An architectural composition with big angles and simple shapes.


Last but not least, the dungeon. Is there a pretty lady in the tower, admiring the pretty Forsythia flames from a distance?


BONUS PICS:
This old house is literally green with envy because she has no Forsythia. So she is hiding behind a snowy blossoming cherry tree.


Pin It

Monday, May 14, 2012

Gift wrapping 5: MAIA's box


Pin It

Yesterday I went to Maia's birthday party. She turned 7. Maia is a genuine artist and she loves everything in a vivid color and an attractive shape. She always buys the crazy-looking buyme-screaming icecream, even if she likes plane old vanilla fudge. So I made for her this 12 pattern gift box. 

Quick tutorial:
1. Cut your paper strips. Start from the edge, leaving a little bit of paper on the outside, in order to cover the corners nicely.
2. Glue the paper strip including the overlapping on the side of the box.
3. Repeat for each paper strip. Rinse, than repeat. (I'm kidding, this only goes for shampoo. But I like the way it sounds :-D)
4. Carefully glue the tips on the top inside of the box.


I've completed the gift box with a polka dot name tag, to which I added a cute little owl for extra whimsy.


Maia was very happy with the gift box, especially because every side had 3 different patterns that never repeated. My thanks to Studio 71 design who created the lovely paperback.


Click here to see other gift wrapping ideas of mine :)

And I've also been featured at Bowdabra, An Original Belle and Mrs. Hines Class - thank you and God bless you!
                                               

LinkWithin

Related Posts Plugin for WordPress, Blogger...