Showing posts with label turquoise. Show all posts

Monday, April 15, 2013

Spring Road


Pin It

I thought you'd never come back, beautiful Spring! You came here in just two days, with happy turquoise skies and fresh green grass beside the road. The country side comes back to life, slowly. The trees are starting to show little buds on the bare branches - and birds are singing everywhere!


Near my dad's orchard, I spy the most beautiful peach trees in full bloom, hidden behind a huge chestnut tree, which is slow to unveil its palm-like leaves. And how could I resist to take a snap of yet another charming turquoise little house? I leave you with the promise of a new journey on the Spring road, under the sun :)


Thursday, March 21, 2013

Pussy Willow Easter Tree


Pin It

First of all, I want to send a big Thank you! to all my friends for your support regarding new ways of managing blogs - thanks a million! Next, I wanna tell you that even though work has been strangling me, Bloglovin has helped me take a peek at your projects :) And third, it just so happened that yesterday I woke up with the urge to make a DIY Easter tree... so here it is! 


Perhaps it was the frustration of not being able to do anything for the home, lately (due to my real job deadlines, as I keep telling you). Or maybe it was my subconscious mind whispering in my head, because I already had these wonderful pussy willow branches on my kitchen counter. Either way, I woke up at 6.45 AM determined to do something. At 7.45 AM, the pussy willow Easter tree was already done!


Dear ladies, I am officially in love! The Easter tree is not among our local traditions, but I've tried my hand at them before (while supervising decorations for commercial venues in my city).  I was first against this foreign custom, but the beauty of these trees conquered me, eventually. So I made up my own version, using what I already had in hand: the willow branches and origami paper. 


The willow is the star of my tree, so soft and fuzzy and cute! Decorating the DIY Easter tree with Easter eggs was a classic choice, but I went with it because I was in a hurry. Choosing paper eggs instead of 3-dimensional ones (real or fake) was also great for my (extremely) limited time. But I would have chosen paper eggs anyway, because they are more subtle, more playful and they also take up less space in the arrangement. 


It is a pleasure to look at and it gives a peaceful feeling to the whole living room. I actually spent more time taking photos of my humble Easter tree, than making it! My inspiration was this blue ceramic pitcher, with a round belly. Its happy color is perfect for Spring and it lifts up my spirits. All I had to do was to find origami paper in matching colors - an array of pale blue, turquoise and lime green. 


Just like I said before, this little project takes 15 minutes to make, so I feel bound to share this very simple DIY Easter tree tutorial:
1. Choose your materials: twigs, branches of any kind, origami paper, scissors, pen, paper glue and thread. I used pussy willow branches because they are so soft and fuzzy.. Make sure the origami paper comes in subdued colors - you don't want to eclipse the natural beauty of the twigs!
2. Cut strips of paper of the same size. The more patterns, the better! The paper eggs you're gonna make will be more attractive if they have different a pattern on each side.
3. Take a blank sheet of paper. Use the paper glue to line the origami strips of paper next to each other, on both sides of the blank.


4. Now you have a patterned canvas. Make sure that the strips on the front and back correspond in position.
5. Draw the egg shape of your choice on each strip of paper. If you're not very artistic, just make an oval.
6. Cut the final paper eggs. Throw the branches in a vase. Hang the paper eggs by a thread.


Hooraaay! The Easter tree has been featured at A Jennuine Life, Suzy's Sitcom, Alderberry Hill and A Glimpse Inside. You've really made my day, thank you for the wonderful surprise! 

A Jennuine Life Thrifty to Nifty Thursdays Feature Suzys Artsy Craftsy Sitcom featured button 


Wednesday, March 6, 2013

Hunting For Color: Turquoise Houses


Pin It

Dear friends, I write this post with the utmost joy and delight. My passion for color is larger than life, I guess you all know it by now. Also, my love for turquoise made me act on my impulses and paint a turquoise accent wall in the living room (you can see it here if you missed it, by any chance). When I see turquoise in front of my eyes, my synapses glitch and endorphin (which is our natural "happiness hormone", don't think otherwise) starts running through my body. 

What you don't know is why I especially love turquoise. I didn't know it either, until I was involved in an accidental healing session, a while back. The reason why turquoise makes me so happy is.... drum rolls... I saw many turquoise houses in my childhood and I loved looking at them. In Romania turquoise houses are very common. We have a cheap affordable paint named "sinila" and it only comes in turquoise. So everybody can paint their house like that!

That brings me to the downside of this sweet childhood memory. On the way to my grandparents (who lived in different cities) we passed through many villages. And in the poorest villages, it was exactly the poorest houses (those crooked little houses which looked like they were about to tumble down any minute) that were painted turquoise. So there was zero chance that my grandparents would succumb to my tears and paint their house turquoise, as well :D

Anyway, enough with this confession. Let me present some turquoise houses from Romania. This first house, with the beautiful architecture, is actually a City Hall in another county. Notice the Romanian flag and the romantic lamp post!


I took this pic on my last holiday at the seaside. This is a very beautiful house, not poor at all. The square shape is killing me, I need a cubic house like that, one day... The owners must really love the color turquoise, just like me. Notice the matching turquoise paint on the wooden fence and the tiny chartreuse detail of the carpentry - boy, they must really love it all! As a bonus, the turquoise highlights the green leaves of all the small plants, bushes and trees from their garden!


This one is from the northern part of the country. Actually it's in the same village as these crazy colored beauties, which I presented in a previous post. I love the peacock blue paint on the door, such an intense accent! I am also jealous of the shabby look of the fence, made of reclaimed wood. The turquoise with the peacock blue and the copper highlights in the wood make a striking color combination!


Don't be alarmed, this is not an actual house. It is an abandoned fishermen shed by a seaside lake, where they used to keep their fishing tools. What I like the most is the rugged texture, with the paint peeling off the walls and everything. So does any of you like looking at turquoise houses, like I do?


Wednesday, February 20, 2013

In The Mood For... Yellow!


Pin It

As I was browsing through my favorite design blogs this week, I came across some beautiful interiors which seemed to have been designed especially for springtime. They were all mainly white, with touches of sunny yellow here and there. Is it just me, or is this a trend for the Spring of 2013? The idea of yellow as an accent for my living room is more and more appealing to me... especially since I've always loved this solar color! Until I'm ready with my new decor, here is a little yellow inspiration from my previous posts. The first pic is from my yellow entryway, of course.


Yellow daffodils and white tulips on my nightstand, pop-art pillow covers, a cool tea mug and the most beautiful turquoise pitcher. Life is beautiful when you've got pretty flowers in the room!


Another thrifted lamp with off-white granny shade and yellow base from my ever growing lamp collection. Perfectly assorted to the yellow flower pot :)


Yellow tulips are hiding this vintage male Russian doll from the curious eyes. I like to think that the little man is not sad anymore.


When I made this photo session with the retro mushroom lamp (yes, yes, I know - I've got too many lamps and too little time to share them!), this was my favorite background: the hand painted faux wallpaper with a retro design from the entryway.


A little yellow stool is the perfect color accent for what used to be my beloved pink backsplash in the kitchen. It went great with the neon items on the kitchen shelf.


Even when I made this crepe paper bunting, I couldn't resist adding a hint of yellow among the other colors.


In the living room, the yellow lantern is the perfect contrast for the turquoise wall. So now, after re-viewing the endless potential of yellow stuff in corners of my home, I think I should definitely work my magic towards a spring living room with yellow accents :) 

Tuesday, February 12, 2013

How To Invite Spring Into The Kitchen


Pin It

The human mind is the most powerful tool that we have. Use it well and small wonders will happen in your life. If you will it strong enough, the spring will be here sooner than you thought! And if you dress-up your home in the spirit of the re-birth season, you'll create a powerful energy which will work in mysterious ways. Of course, working on the full scale of a house may be a little too endeavoring, but you can settle for a smaller project. Dress-up your kitchen, the heart of the home and the one place where you ladies spend a lot of time :)


I will exemplify by showing you how I switched to spring colors in my own kitchen. You can choose a theme  which reminds you of spring, like birds, daffodils, bird houses or April showers. I just went with the most convenient option: a spring color scheme throughout the kitchen. It was really easy to do, given the fact that my kitchen cabinets, walls and floors are all white or off-white. Working with a light, neutral background allowed me to add pops of color everywhere, without worrying that the colors may clash with each other.


So here is my simple color scheme for the spring of 2013: lime green, turquoise and a little bit of dusty pink. It's always safe to choose two colors for the main objects. In my case, turquoise and lime green are spread evenly among the colored objects. Then choose a third color in a different saturation and use it in small doses, for a little contrast. And since the lime and turquoise were already vivid, saturated colors, I went with a dusty pink, a more pale shade, for the contrast.


To my advantage, the whole process was done by simply shopping my own kitchen cupboards. I didn't have to buy anything new, since I already had dishes, bowls, cups, plates and plates in all of the above colors. So I just took down any kitchenware in red, yellow and purple. Then, I took out the turquoise and lime items and arranged them on the shelves. Now that you have your bold colored objects, fill in the blanks with neutral hues. You can spot the spice jars, the white ceramic pot and the honey jar, which complete the happy spring display.


If you think that a simple parade of colored objects doesn't "scream" spring or if you really want to try something more visual, you can always resort to art. Hold on, this doesn't have to cost a thing! Art can be something your children drew at school, pages from a magazine or old photos printed at home. You don't have to spend any money on framing it, either. Simply use some colored washi tape and stick the paper on the wall. It will hold well and when you're done the art will come off easily, without damaging the walls (or cabinets, or windows).


A big THANKS! to The Artsy Girl Connection for featuring my spring color post!
the artsygirl connection

Monday, February 4, 2013

Crepe Paper Bunting


Pin It

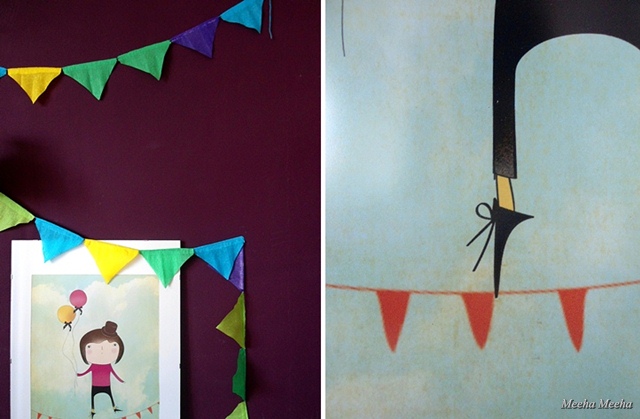
Welcome, pretty spring colors! In honor of the first sunshine days of 2013 (I know, it's been a gloomy year so far!) let's celebrate with a happy crepe paper bunting. The event takes place at my space - in fact the party has already started in my bedroom. The painted dark purple wall (painted by yours truly!) is the perfect backdrop for all the yellows, greens, turquoise and indigo flashes of my crepe paper bunting.


Crepe paper has been my favorite DIY media ever since... oh well, kindergarten! It comes in all colors and it's affordable for anyone. Speaking of its low cost, you can use crepe paper for projects that require LOTS of material, without having to break the bank. Also, you can get creative and try lots of new stuff, because if you mess up with something, there's always plenty more crepe paper rolls and you can start all over again.


The key to display a happy bunting is to gather around some items that you love and are dear to your heart. This way, the impact on your brain doubles, triples, gets ten times bigger and you just have to smile every time you go pass the little "spring shrine". For example, my white princess lamp makes the perfect accent on the purple wall. I also love the contrast between its romantic shape and the mundane texture of the colored crepe paper triangles.


But my display doesn't feel quite right with just ONE lamp. So I also added the green apple floor lamp. An apple a day keeps the doctor away :) Also two lamps in one spot make the perfect backdrop :) And the evergreen "Two lamps are better than one" :)) Seriously now, I think this is definitely my styling signature, because in many of my home corners I've used two lamps together. And I loved it every time.


I've made the crepe paper bunting last spring, so it's not big news on my blog. Still, for those of you who need a little guidance in putting together a banner of your own, here is a small tutorial and the steps to follow:
1. Choose your colors. The variety of crepe paper colors can be overwhelming, so I suggest to play with the rolls until the color combo looks right. The safest way is to go with 3 main colors and then you can as many nuances as you want. 
2. Cut the crepe paper into triangles. The triangles mustn't be even on all sides: leave one side bigger, because that's where you'll be attaching the bunting triangles to the yarn.
3. Apply glue onto the thick side of the triangles, choose a happy colored yarn and start putting everything together. Enjoy!


 A big, big Thanks! to Abbie for featuring the crepe paper banner on Five Days... Five Ways, this is awesome!
five days five ways | feature friday free for all 


Wednesday, December 12, 2012

DIY Christmas Ornament


Pin It

This is my first year in blogging and the second swap already! First, I participated in the Pumpkin Swap organized by Laura from Vivere a piedi nudi / Living Barefoot and Anna from Tulimami - you can check out the beautifully unconventional pumpkin that Anna made for me here. And now it's time to show you the ornament I've made for Stephanie from Toastie Studio, participating in the Ornament Swap organized by Tutus and Tea Parties.  


Stephanie told me that she had big plans for her little Christmas tree. She even showed me her Pinterest board on the subject: her theme was elegantly turquoise / peacock. I made my DIY Christmas ornament late one night so there are no how-to pictures. I just bought turquoise beads, put them on a wire and twisted the wire in the shape of a Christmas tree. The ornament was looking a little dull, so I added two pink beads for a chic update. Click here to see what lovely ornaments Stephanie made for me, in my colors!


LinkWithin

Related Posts Plugin for WordPress, Blogger...