Showing posts with label IKEA. Show all posts

Thursday, February 13, 2014

(Early) Spring Balcony


Pin It

Thank God for warm (and sometimes sunny) weather! Who would have thought that we could enjoy a cup of tea on the small balcony, in February?! So, the days went from bloody freezing to mild and I prepared a cozy corner on the balcony. We've got sheep skin to keep us warm, a well equipped serving tray, potted plants and fresh flowers :)


The pride of my spring balcony are the "green babies" who survived a cold Romanian winter. These plants, mostly succulents, spider plants and ferns, are already trained to spend a few months on the chilly balcony. The space is enclosed with glass, but it's not heated and not many plants can make it til spring. 


I've already daydreamed about enjoying a cup of mint tea with my boyfriend :) Valentine's Day is tomorrow and the balcony is the perfect place to spend the morning together. That's why there is a whimsical heart hanging there. I love the way it looks, with the dusty pink silk and the delicate lace. But the hearts means so much more to me, because it's a handmade present from lovely Lisa. Hop over to her blog Lisa Sol to see her talent in action!
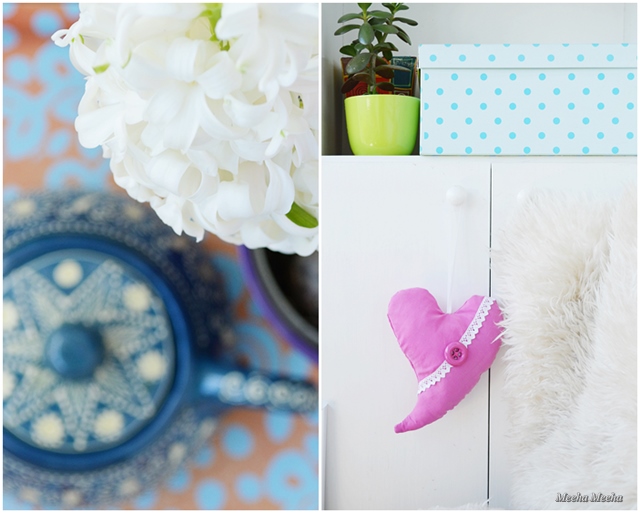


The colors make me smile and it feels like Spring already! Even the hyacinths come in three colors! I just used whatever was handy, not thinking about the chromatic at all. That's why you can see a lovely mix of greens, blues and pinks against the white background of the balcony. Oh, and a little bit of yellow, too!


Ladies, you are invited to take a break with me on the balcony. It is warm and fresh in here. It smells of hyacinths and tea and honey. The teapot is made by local artisans and the green poster is a simple DIY from origami paper. If it gets dark, we'll light the candle and the Moroccan lamp on the shelf! 


Tuesday, February 11, 2014

Random Happy Home


Pin It

A lazy home is a happy home! Colors are clashing together; toys, potted plants and tiny things keep piling up everywhere; the cats look wonderfully furry against the cold weather outside. Lots and lots of good books to read. Friends are showing upon my doorstep at least twice a week for game nights, in spite of the happy mess. I couldn't ask for more :)


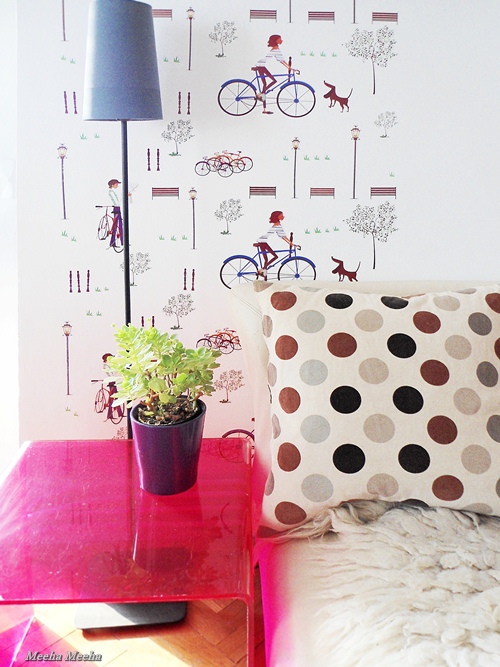
Above you can see my messy reading corner in the home office. It consists of a neutral bean bag and a pile of books and boxes. I love the way the patterns come together: the Ikea pillow, the traditional rug and the bicycle pattern of my DIY faux wallpaper. And since I bought lots of bulbs last October, we've had hyacinths blooming indoors all winter long :)


My kitty Anais in her favorite spot: next to the kitchen window, where little doves are nesting. On the kitchen shelf, take a peek at my expanding collection of spices and herbs. This little horsey thinks he is a unicorn - I've got a plan to add a small horn and make him into a real one...


Apart from trying out new recipes (involving lots of veggies and lentils), I've been secretly drawing new patterns. My friend Miguel encouraged me to doodle till I die. Now I never leave home without my sketchbook and it feels so good!


More random pics from the happy home: the orchid buds, feathered blue DIY box on my desk, more colors and pattern mixed in the bedroom (including another gorgeous traditional wool rug) and the whimsical owl gift bag, the inspiration for a future DIY project called "Free art for your walls". To be continued :)


Tuesday, December 10, 2013

Wild Herbs Christmas Wreath


Pin It

Hello, dear friends, I'm excited to announce that I've made my first DIY wreath ever! So I would like to apologize in advance, because this post is gonna have LOTS of pictures...
I've been dreaming of making a wreath since 2005, when I was just entering the fabulous world of interior design blogs. We don't have many wreaths in Romania (and there are no supplies at the craft stores) and I have always been afraid to make one. I was convinced that the leaves would fall off and that the wire base would show...

For my first wreath I wanted the real deal: real natural plants, no plastic allowed. Long story short, we went to a picnic in the middle of November, on a sunny hill at the edge of a beautiful forest. There were lots of wild herbs, which we call "immortal" because they dry out in the field and stay like this forever. I filled the trunk of my car with a bunch of herbs in awesome shades of silver, soft brown and pale lavender. Plus a few thistles. Perfect materials for a natural wreath :)


The natural herb Christmas wreath sits in the bedroom, hanging by a traditional red and white ribbon. It complements the other flowers who live by the bedroom window: a small white Saint Paulia and three orchids which are getting ready to bloom in a couple of weeks. 


Initially, I was going to make the simplest wreath design possible. At the last minute, I've decided to add a little twist to my simple wreath, so I placed the thistles in a small bouquet on one side. A little "bling" goes a long way :)


I've kept the bedding white and full of texture, combining natural white cotton sheets with linen and sheep skin pillows. It tickles the senses and lets the Christmas wreath steal the show. Each morning I smile thinking that I live in a bohemian hotel in Paris :)


How to make a Christmas wreath
If you are like me, a novice in wreath making and a little afraid to try it, I've got 3 words for you: Just do it! I'll guide you every step of the way with my DIY wreath tutorial:
1. Gather your materials: natural plants, scissors and wire. That's all you need!
2. Use a wreath base (you can find them in stores) or make one yourself, from electric cord or thick wire.
3. Make a small bouquet and tie it with floral wire. Make the front line flowers smaller than the ones in the back and spread them like a fan. Layer the colors by height: I put the short brown twigs in the front, then the longer lavender ones and kept the tall silver ones in the back.
4. Cut off the extra length of the branches. My bouquets are 10 cm (4 inches) long.
5. Make an extra bouquet from different branches for the wreath's graphic accent.
6. Repeat step no. 3 and 4 until you run out of stuff. I've made exactly 30 small bouquets.
7. Attach the first bouquet to the wreath base and secure it with wire. Make sure that the bouquet is on the outside of the base curve.
8. Continue with the rest of the bouquets, just like you did with the first one. Don't be afraid to squeeze them together - this way you make sure that the base will be fully covered.
9. This is how the wreath looks when you turn it over. Add some pretty ribbon and enjoy!


Linking up to these lovely parties.
And some of them require a backlink in the actual post, so here they are:
http://adiamondinthestuff.blogspot.ro/   http://www.myuncommonsliceofsuburbia.com/   http://www.blackberryvine.blogspot.ro/   http://www.cedarhill-ranch.com/   http://diycraftyprojects.com
http://www.sew-much-ado.com/   http://www.elizabethandco.blogspot.ro/   http://thelifeofjenniferdawn.blogspot.ro/

Monday, March 25, 2013

Space Saving Tip: Double Duty Laptop Table


Pin It

Good Monday, everybody! Today I wanna share a little tip for those of you who live in a small space, just like me. Use a simple laptop table as a coffee table, a side table or even a night stand, if it suits you. A small living area doesn't have to be ugly and it doesn't have to be cramped. That's why we need to edit a lot and to keep visible stuff to a minimum. Out with a zillion knick-knacks, in with a small display on a tray, a cabinet or a side table.


I guess you are all familiar with the Ikea laptop table. It comes in many colors (mine is black, but you can have it on red, white or blue) and it's very handy whether you surf the net from your couch or directly from your bed. I really like it, but every now and then, for a week or two, I don't use it that much. That means that the laptop table occupies some space in my little apartment without serving a purpose. So I just use it as a minimalist side table.


When you live in a small home, every square foot matters. Think outside the box and don't hesitate to assign new functions to your pieces of furniture. This item, for example, can serve as a laptop table in the weekend and as a side table during the week, if you just need a place to display pretty flowers for as long as they last. Which reminds me to add another pic of the pink azalea :)


Update: I want to send a big Thanks! to Abbie from Five Days, 5 Ways, to Lauren from If It's Not Baroque and to Sarah from Sarah Dawn Designs for featuring this post :)

Thursday, March 14, 2013

Enjoy A Simple Bedroom


Pin It

LESS IS MORE.
These are the words that sum up my view of design (really?!),  personal style and life in general. While it is easy to maintain a minimalist look in a large space (because there's always room for ... stuff), real life tends to overwhelm small rooms (because we need several certain functional items to be IN that little room...). Also, I personally find that a bunch of personal stuff makes a small space even more cozy! But every now and then, I just take things away from one room instead of adding more. And the result is simple, streamlined, uncluttered beauty.


After the dramatic makeover of my Valentine bedroom, I needed to cool it down a bit, so I created a calmer place. The colors are less vivid and the decorations are kept to a minimum. If you wish to create a simpler design for your room, follow these simple tips:
1. Stick to the basics. Remove all unnecessary items from the floor, the walls, tables etc. For example, my simple bedroom has a bed, a wardrobe, a little nightstand and a small carpet. No cluster of pictures on the walls, no throw pillows and extra duvets on the bed, no poufs or boxes on the floor. And I could have lived without the rug, too :)


2. Choose double-duty furniture. Use clever space saving pieces of furniture: a convertible sofa for an extra bed; a stool or ottoman with ample storage space; a folding table which can transform into a desk; a stool which can serve as a coffee table, an end table or a nightstand (like the one you can see in here).
3. Avoid too many colors. Decide on a simple color scheme and stick with it. This way, the eye will travel across the room. Too many colors would make the area seem too busy and cluttered.


4. Avoid too many patterns. The safest way to play with a simple interior design is to work with solid colors for everything. Solid color translates as a single unit into your brain - this way, you perceive the room as simple, with a small amount of objects inside. But if you are playful by nature and you can't stay away from pattern (like me), make sure that you don't have more than 3 patterns in the room and that these patterns are different sizes (notice that the rug stripes are so much smaller than the flowers on the bed sheets).


5. Make it personal. A simple space doesn't have to be devoid of all personal objects - it's your home, after all, not a hotel. Choose something small, but significant, to make the space cozy and familiar. For my simple bedroom, the choice was easy: a potted plant (the beautiful Madagascar Jasmine, who refuses to bloom but still graces us with its beautiful foliage) and a Mongolian doll dear to my heart. And now I feel at home!

A little update, ladies! My thanks go to Carolyn from Homework and to Betsy from Romance on a Dime for featuring my simplified bedroom - thank you very much indeed!

Tuesday, March 5, 2013

Random Happy Home


Pin It

Hello, friends! Spring is in the air! The light is magical! I've prepared new colors in the home and I also have big plans for this weekend :) Let's start in the home office, where my DIY wallpaper is once again in full season, since in a short while we'll be able to take a walk in the park and savor the shadows of fresh green leaves in the trees! Seriously, my cyclist friends have already taken their bicycles out for a ride (and one of them almost broke a leg, what a bummer)... 


In the bedroom I've created a little contrast for the dark purple wall... I must admit that, instead of trying out something new, I was inspired by last Spring's colors (and also by the fact that I received the most beautiful azalea topiary). You can also spy a beautiful poppy painting. I need to re-frame it asap, because the black frame doesn't do anything for me... and it kills the appeal of the painting, too.


Let's linger in the sunny bedroom for just a few moments more. I want to show you the dark purple sheets, a perfect match for the purple painted wall across the bed. Both the purple duvet cover and the yellow pillows are from Ikea, a stylish resource in textile, very convenient for my budget. I just love the way the circles in the pillow print echo the design of the white retro lamp! And, on a personal note, yellow and violet scream Pansies! to me - I can't wait to fill my balcony with yellow/purple pansies :)


Speaking of the small balcony, here's a sneak peek through the glass door. I moved my second pink lucite table on the balcony, for a change. The hot pink is the perfect contrast for the green leaves. I can almost feel the energy of the happy colors entering the home. I hope that tomorrow I will be able to share more pics taken from the balcony. There are no flowers yet, but the Spring light and the green leaves are surely a great way to start the day :)


Moving into the kitchen, where I've already switched the color scheme to welcome spring (as I posted here earlier). The glass of the spice jars captures the light entering through the window and reflects it back into the room. It makes everything look more sparkling! Even the honey jar looks like a giant gem stone, because of the reflexion. So if you need more light into the home, use glass vases and accessories, or even better, a few mirrors, and let the sunshine rays bounce forth and back into your space!


I'd like to end this post on a personal note. Even if sunshine is back into our life, it is freezing outside! I haven't ditched my green winter coat yet, or my dusty pink boots, but at least they are a match to the pavement in my city :) And I'm wearing one of my favorite dresses, colored little hearts and everything...

Friday, January 18, 2013

The Reading Spot


Pin It

Look, there is a spotted pillow in the reading spot :)) Sorry, I just couldn't resist the pun. It looks like there are more doors than corners in my small apartment, because of the architecture itself and because I tore down some walls when I redecorated it. So the quiet corner is near the door, but who cares... I've assorted the Mad Hatter poster to a tiny lithography in the same colors. One big and one very small, I love the contrast between those two pieces of art on the white wall. Their vivid colors are completed by the earth tones of the wooden stool, the Ikea pillow and the pine wood door. Oh and I'm currently reading a SF novel by the Strugatsky brothers.


Friday, December 7, 2012

Bedroom Light


Pin It

"Here comes the sun, little darling... Here comes the sun... It's alright (Tananananana...)" is the first thing that comes to my mind. A song to celebrate the sun. After 4 weeks of really dark skies, after yesterday's snow, came a little sunshine to brighten up my day. And my mood (now that I have the fever, I might use the cold remedy tea sooner than I expected). I had no time to prepare anything with a Christmas touch, as I was already running late for work, so I just snapped some pics with the light slipping on the bed cover and onto the wall.


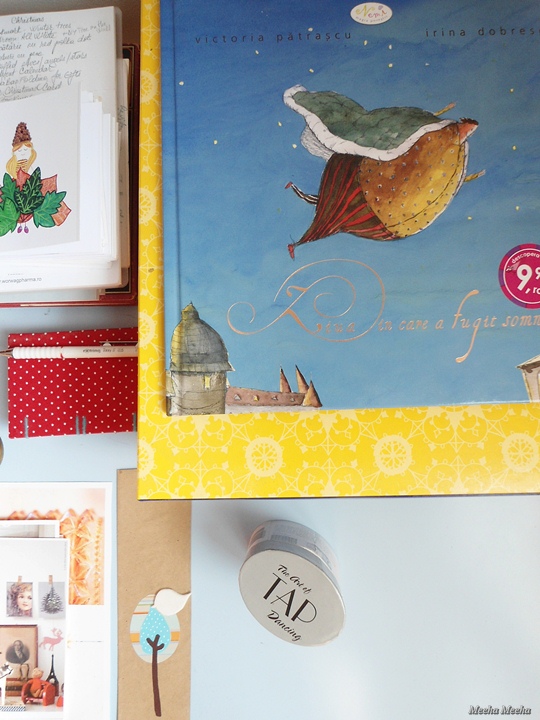
On my nightstand (a re-purposed, moved around the house powder blue Ikea Lack coffee table) there is all the goodness in the world. The stuff that dreams are made of: a children's book with wonderful illustrations by a Romanian artist (entitled "The Day That Mr. Sleep Ran Away") - check!, a pocket-size handmade journal with red polka-dot fabric and coptic bound in turquoise wax thread (from the days when my friend Ana and me were only fantasizing about opening our Etsy shop) - check!, tap dancing metal plates - check! and an old handmade bookmark - check!


Just looking at these pics makes me smile - who knows when are we going to enjoy another sunshine day like this? The weather prognosis is dreadful, so all I've got left is the pattern the light makes when it comes crawling onto the crochet pillow and the orange bed sheet. Note to self: need to change them soon and figure something else for the upcoming Christmas celebration...


Opposite the bed is that one DIY project that never bores or disappoints me - my beloved purple plum accent wall and the vintage cabinet I inherited from my grandfather. I've got my childhood turntable and my favorite vinyls in there, plus a plethora of matryoskas and other ethnic dolls collected over time. Far in the back, the Burberry style cardboard boxes. I already grew tired of that look, so I need to paint them soon!


LinkWithin

Related Posts Plugin for WordPress, Blogger...