Showing posts with label plants. Show all posts

Thursday, February 13, 2014

(Early) Spring Balcony


Pin It

Thank God for warm (and sometimes sunny) weather! Who would have thought that we could enjoy a cup of tea on the small balcony, in February?! So, the days went from bloody freezing to mild and I prepared a cozy corner on the balcony. We've got sheep skin to keep us warm, a well equipped serving tray, potted plants and fresh flowers :)


The pride of my spring balcony are the "green babies" who survived a cold Romanian winter. These plants, mostly succulents, spider plants and ferns, are already trained to spend a few months on the chilly balcony. The space is enclosed with glass, but it's not heated and not many plants can make it til spring. 


I've already daydreamed about enjoying a cup of mint tea with my boyfriend :) Valentine's Day is tomorrow and the balcony is the perfect place to spend the morning together. That's why there is a whimsical heart hanging there. I love the way it looks, with the dusty pink silk and the delicate lace. But the hearts means so much more to me, because it's a handmade present from lovely Lisa. Hop over to her blog Lisa Sol to see her talent in action!
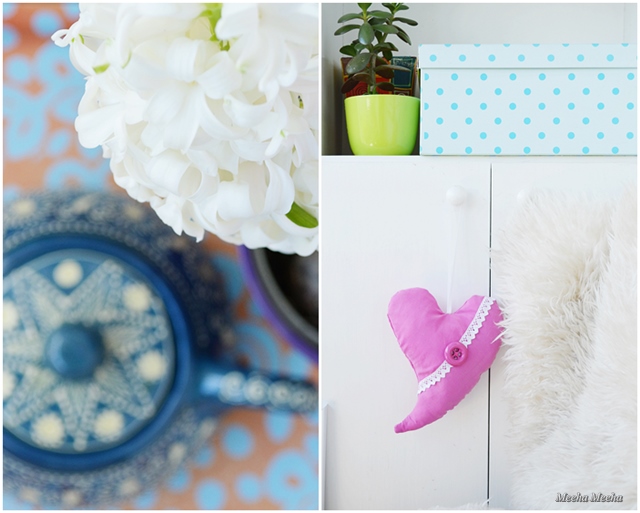


The colors make me smile and it feels like Spring already! Even the hyacinths come in three colors! I just used whatever was handy, not thinking about the chromatic at all. That's why you can see a lovely mix of greens, blues and pinks against the white background of the balcony. Oh, and a little bit of yellow, too!


Ladies, you are invited to take a break with me on the balcony. It is warm and fresh in here. It smells of hyacinths and tea and honey. The teapot is made by local artisans and the green poster is a simple DIY from origami paper. If it gets dark, we'll light the candle and the Moroccan lamp on the shelf! 


Friday, December 13, 2013

Monochrome Gift Wrapping


Pin It

Natural herbs have become my best friends! You can see how I've played with their delicate hues and intricate designs here and here. Now I thought of celebrating their beauty by incorporating them into a subtle gift wrapping in the same color. Here they are: monochrome gifts!


There are several ways you can apply the dried herbs while keeping a minimalist appearance of the gift wrap, as you can see in the photos below:


Just wrap the gift box in soft lavender and put the twig on top. Secure the gift with a single line of wool.


For the black gift wrapping I used a little bit of black washi tape to keep the berries on top of the box.


Or you can tie together two twigs with thread, then add a drop of glue onto the craft paper gift wrapping!


The monochrome gift wrapping is super-easy to make if you stick to these simple rules:
1. Choose your natural twigs and berries first, then find color-coordinated paper in similar shades.
2. Use little or no yarn at all (same goes for ribbon, tags or other embellishments).
3. Less is more - don't overcrowd the gifts. But you can be as creative as you can :) Enjoy!


Linking up to these lovely parties.
And some of them require a backlink in the actual post, so here they are:
http://adiamondinthestuff.blogspot.ro/   http://www.myuncommonsliceofsuburbia.com/   http://www.blackberryvine.blogspot.ro/   http://www.cedarhill-ranch.com/   http://diycraftyprojects.com
http://www.sew-much-ado.com/   http://www.elizabethandco.blogspot.ro/   http://thelifeofjenniferdawn.blogspot.ro/

Tuesday, December 10, 2013

Wild Herbs Christmas Wreath


Pin It

Hello, dear friends, I'm excited to announce that I've made my first DIY wreath ever! So I would like to apologize in advance, because this post is gonna have LOTS of pictures...
I've been dreaming of making a wreath since 2005, when I was just entering the fabulous world of interior design blogs. We don't have many wreaths in Romania (and there are no supplies at the craft stores) and I have always been afraid to make one. I was convinced that the leaves would fall off and that the wire base would show...

For my first wreath I wanted the real deal: real natural plants, no plastic allowed. Long story short, we went to a picnic in the middle of November, on a sunny hill at the edge of a beautiful forest. There were lots of wild herbs, which we call "immortal" because they dry out in the field and stay like this forever. I filled the trunk of my car with a bunch of herbs in awesome shades of silver, soft brown and pale lavender. Plus a few thistles. Perfect materials for a natural wreath :)


The natural herb Christmas wreath sits in the bedroom, hanging by a traditional red and white ribbon. It complements the other flowers who live by the bedroom window: a small white Saint Paulia and three orchids which are getting ready to bloom in a couple of weeks. 


Initially, I was going to make the simplest wreath design possible. At the last minute, I've decided to add a little twist to my simple wreath, so I placed the thistles in a small bouquet on one side. A little "bling" goes a long way :)


I've kept the bedding white and full of texture, combining natural white cotton sheets with linen and sheep skin pillows. It tickles the senses and lets the Christmas wreath steal the show. Each morning I smile thinking that I live in a bohemian hotel in Paris :)


How to make a Christmas wreath
If you are like me, a novice in wreath making and a little afraid to try it, I've got 3 words for you: Just do it! I'll guide you every step of the way with my DIY wreath tutorial:
1. Gather your materials: natural plants, scissors and wire. That's all you need!
2. Use a wreath base (you can find them in stores) or make one yourself, from electric cord or thick wire.
3. Make a small bouquet and tie it with floral wire. Make the front line flowers smaller than the ones in the back and spread them like a fan. Layer the colors by height: I put the short brown twigs in the front, then the longer lavender ones and kept the tall silver ones in the back.
4. Cut off the extra length of the branches. My bouquets are 10 cm (4 inches) long.
5. Make an extra bouquet from different branches for the wreath's graphic accent.
6. Repeat step no. 3 and 4 until you run out of stuff. I've made exactly 30 small bouquets.
7. Attach the first bouquet to the wreath base and secure it with wire. Make sure that the bouquet is on the outside of the base curve.
8. Continue with the rest of the bouquets, just like you did with the first one. Don't be afraid to squeeze them together - this way you make sure that the base will be fully covered.
9. This is how the wreath looks when you turn it over. Add some pretty ribbon and enjoy!


Linking up to these lovely parties.
And some of them require a backlink in the actual post, so here they are:
http://adiamondinthestuff.blogspot.ro/   http://www.myuncommonsliceofsuburbia.com/   http://www.blackberryvine.blogspot.ro/   http://www.cedarhill-ranch.com/   http://diycraftyprojects.com
http://www.sew-much-ado.com/   http://www.elizabethandco.blogspot.ro/   http://thelifeofjenniferdawn.blogspot.ro/

Friday, November 15, 2013

Brown Bottle Fall Centerpiece


Pin It

It's the middle of November and we've been incredible lucky to have 3 weeks of Indian Summer here in beautiful Romania. The weekends were warm and sunny and we had a picnic every Sunday. I got home with a lot of fall clippings and wild herbs. Their colors are amazing: silver grey, soft honey brown and subtle lavender - so I decided to use them in a Fall centerpiece.


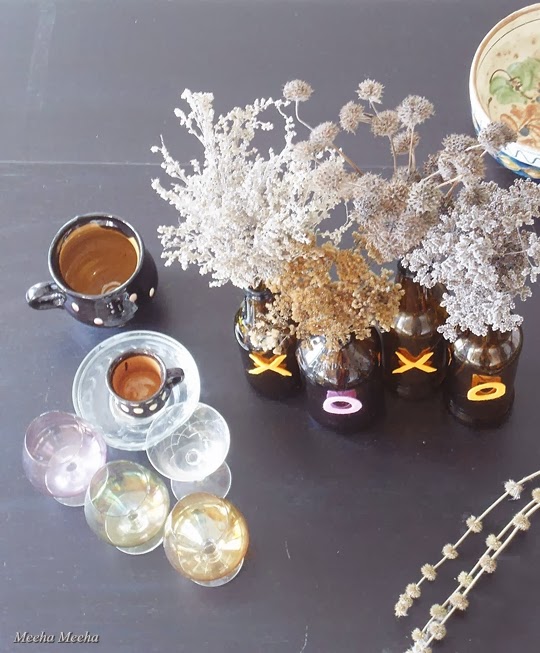
Let's take a normal look at the dining room table. That's better... The light colors of my clipped herbs needed some contrast, so I put them in brown bottles. The earth tones arrangement goes so well with the glowing Autumn light! I reached into my cupboards for the perfect companions: small brandy glasses in tinted hues, traditional pottery from my country and a tiny brown apothecary jar filled with spices.


Of course, an all-neutral-decor is too much for me to handle. I just can't do it. It may be classic, timeless, effortless and perfectly elegant, but it just isn't my style. So I added a little twist to my brown bottle centerpiece: a kiss made of pink and orange felt letters. Now we're talking!


This little DIY can be made and re-made in so many ways! For my friends in the USA, the letters could say "THANKS" - it would make a great centerpiece for Thanksgiving! For my European friends, you could spell "AUTUNNO" or something similar. Spot the differences in the 2 images from above! You can leave the bottles standing solo, as well as decorate with additional items - either way, the centerpiece still looks great.


Styling tip: play a little with the height of the bottles. Make the arrangement more interesting and invite the eye to travel across the table by assorting slightly different items. As you can see, I used 3 different sizes. Also, play with the height and dimensions of the flowers / fall clippings. You can create the WOW! effect if you vary the bouquets (some larger, some taller, some smaller) instead of repeating the same bunch of flowers in every bottle. 


Brown bottle centerpiece tutorial:
1. Choose your felt in one o more colors. Trace the outline of your letters, using a marker. The thicker the marker the better (felt is not easy to draw on!).
2. Cut the felt letters with a sharp tool. Make sure that the marker outline is not visible on the final letters. 
3. Use a needle & thread to make a chain around each bottle, each one holding a letter. You can also glue the felt letters directly on the bottles, but I like the thread better, because it looks more loose (and I can simply re-use the brown bottles later).
4. Stick the fall clippings in the bottles and enjoy your Fall centerpiece!


Wednesday, October 30, 2013

The Gourd In The Glass Jar


Pin It

Should I say "The gourd cloche"?
Or better yet "The gourd terrarium"?
No matter how hard I try, it seems impossible to come up with a good title for this post. Friends, this is the big reveal to yesterday's post and its burning question. How to decorate with a gourd that has pointy bumps on each end and doesn't want to stand upright?! It upsets my OCD... So my solution was to put it in a bowl full of gravel. Even better, I put the gravel in a big empty glass jar (recycled, of course - see it here full of paper-whites) and then I put the gourd on top of the gravel. It doesn't stand vertically, but it's enough for my design sensibility.


The gourd in the glass is now good enough to star in a pretty fall vignette. If you're not sure where to start in creating a vignette, click here to see my tutorial on how to make a balanced vignette following a few simple rules. As you can see in the first pic, I chose natural elements and neutral colors for the arrangement. We've got everything: wood (the desk, the blank Russian doll), glass (the jar), metal (the vintage can), wax (the candle), ceramics (the mushroom salt shaker). The whole thing forms an "A" shape, for instant eye attraction. The whole thing is sitting pretty on the desk. So I created a vignette inside a vignette!


Talking about personal history, almost every single item in this pic has a special meaning to me, so I love it even more:
- Let's start with the desk: my dad bought it for me when I was 9 and I've had it ever since.
- The round brown sign was written freehand by my sweet Ana from Uituka, who is a master of typography. Don't ask me what is says, because we wanted to say "Division of labor" but in the end she came up with this untranslatable joke in Romanian.
- The blank Russian dolls are a birthday gift from my friend July. I've wanted a blank set for ages and even found some good deals on Amazon, but now I can't to paint them!
- The succulent is a gift from Sigrid's mom, from the most beautiful autumn garden I have ever seen "live".
- I stole the vintage tin can from my grandma, it was a tobacco box from the 1930s.
- And I saved the best for last: in the last pic you can see my cat Anais hidden inside the desk box. She does that to protect my cards and illustration from fading, right?


Friday, September 20, 2013

The Last Petunias & Pansies On The Small Balcony


Pin It

Good bye, hot summer days! Good bye, summer blooms! Little pansies, you are the last ones standing (in the pot), more fragile than Chinese paper rolls. Thank you for being my friends throughout the endless summer days. Thank you for not giving up on me, every time I was gone and there was just not enough moisture in the air. Thank you for showing me your soft velvet colors and for keeping me great company.


And farewell to you, too, sweet and sensual petunias. You've given me the splendor of your bursting blooms - dozens of them, springing out of the pot like a magic fountain of purple delight! Thank you for teaching me optimism, positive thinking and stamina! I'll always cherish you, especially in the darkness of the dreaded winter season. I love you, silent pets, quiet friends of ephemera life.


Friday, April 19, 2013

Decorate With A Song: Jungle Boogie!


Pin It

So many friends ask me where I get the inspiration for my colorful decor. I'll tell you my secret: I DECORATE WITH A SONG!

Please press play and read the rest of the entry while listening to this song :)


I was listening to this retro classic one morning, when my legs started dancing to the music. It was so cool, that I immediately asked myself: would it be possible for me to actually go to the jungle and feel the energy? Well, yes... but it's not gonna happen very soon! And with this long wait for the trees to come to life once again, I suddenly had an inspiration: I'm gonna make the jungle come to me!


Easier said than done? Don't think so! All it took was a trip to the balcony. I got my tropical plants together and put them on the floor: the coconut, the Sago palm and the umbrella tree. That's enough of a jungle corner in my little apartment, I guess! All that was needed was a funky chair, a comfy pillow, a favorite book on decorating by their side and it was done!


I love the way the colorful pillow stands out among the neutrals (and yes, I count green as a lovely neutral). I wasn't sure what kind of stool to add into the composition, maybe a retro Tam-tam stool to go with the retro song? But I finally went with the classic approach, bringing in the wooden stool, for a more organic feeling. Also, the natural color blends in with the plants. So there you have it, a jungle corner inspired by a song - enjoy the weekend!


  PS: You may want to read about my first decor inspired by a song here: The Mad Hatter home office was inspired by yet another silly song... it works like a charm ;)


Thursday, March 7, 2013

White And Green Balcony


Pin It

Dear ladies, this is how my small balcony looks in the first days of March. I promised you some pics and I hope you won't be very disappointed. I know that usually my little zen spot is bursting with flowers, but this post is about a flowerless balcony. Nevertheless, I like it very much like this, all white with the green popping out of the picture. White and green, what a soothing combo!


The balcony is enclosed with glass, but the Romanian winters are very cold and there is no heater in here, so the temperature inside the balcony is very low during the cold months, somewhere around 5 to 10 degrees C (40-50 F). Not many plants are sturdy enough to endure such a cool climate, so many of my pots go inside the apartment during wintertime. The ones that make it are the evergreen house friends: ferns, sago palms, umbrella trees, spider plants and succulents. 


The lack of flowers didn't stop me from adding a little bit of color, though. There are colorful pot holders in the storage area, also the loveliest blue dotted storage box and an old friend, the shaman who acts as a cool doorstop for the balcony in the summertime. All these little spots of intense color pop out from the white background, so I keep things simple and uncluttered in here. Painting the storage area white was the best idea I had for the balcony makeover, as you can see here. 


Good news, my friends! My white and green balcony was featured at The Gingerbread Blog and Craftionary - thank you very, very much for sharing this simple project!
  craftionary

LinkWithin

Related Posts Plugin for WordPress, Blogger...