Showing posts with label Easter. Show all posts

Sunday, April 20, 2014

Happy Easter!


Pin It

Happy Easter, dear friends, may your hearts be blessed with purity and sheer joy! I hope you all get to spend wonderful moments with your loved ones!
And to my sweet Romanian friends and readers, Hristos a înviat!
Va imbratisez pe toti cu drag si va doresc sa va bucurati cu inima curata si plina de iubire :)

PS: I've been tackling my first decorating project for a commercial client. I've decorated a pub, yay! So stay close, for I am about to reveal quite a few before-and-after photos :)

Thursday, March 21, 2013

Pussy Willow Easter Tree


Pin It

First of all, I want to send a big Thank you! to all my friends for your support regarding new ways of managing blogs - thanks a million! Next, I wanna tell you that even though work has been strangling me, Bloglovin has helped me take a peek at your projects :) And third, it just so happened that yesterday I woke up with the urge to make a DIY Easter tree... so here it is! 


Perhaps it was the frustration of not being able to do anything for the home, lately (due to my real job deadlines, as I keep telling you). Or maybe it was my subconscious mind whispering in my head, because I already had these wonderful pussy willow branches on my kitchen counter. Either way, I woke up at 6.45 AM determined to do something. At 7.45 AM, the pussy willow Easter tree was already done!


Dear ladies, I am officially in love! The Easter tree is not among our local traditions, but I've tried my hand at them before (while supervising decorations for commercial venues in my city).  I was first against this foreign custom, but the beauty of these trees conquered me, eventually. So I made up my own version, using what I already had in hand: the willow branches and origami paper. 


The willow is the star of my tree, so soft and fuzzy and cute! Decorating the DIY Easter tree with Easter eggs was a classic choice, but I went with it because I was in a hurry. Choosing paper eggs instead of 3-dimensional ones (real or fake) was also great for my (extremely) limited time. But I would have chosen paper eggs anyway, because they are more subtle, more playful and they also take up less space in the arrangement. 


It is a pleasure to look at and it gives a peaceful feeling to the whole living room. I actually spent more time taking photos of my humble Easter tree, than making it! My inspiration was this blue ceramic pitcher, with a round belly. Its happy color is perfect for Spring and it lifts up my spirits. All I had to do was to find origami paper in matching colors - an array of pale blue, turquoise and lime green. 


Just like I said before, this little project takes 15 minutes to make, so I feel bound to share this very simple DIY Easter tree tutorial:
1. Choose your materials: twigs, branches of any kind, origami paper, scissors, pen, paper glue and thread. I used pussy willow branches because they are so soft and fuzzy.. Make sure the origami paper comes in subdued colors - you don't want to eclipse the natural beauty of the twigs!
2. Cut strips of paper of the same size. The more patterns, the better! The paper eggs you're gonna make will be more attractive if they have different a pattern on each side.
3. Take a blank sheet of paper. Use the paper glue to line the origami strips of paper next to each other, on both sides of the blank.


4. Now you have a patterned canvas. Make sure that the strips on the front and back correspond in position.
5. Draw the egg shape of your choice on each strip of paper. If you're not very artistic, just make an oval.
6. Cut the final paper eggs. Throw the branches in a vase. Hang the paper eggs by a thread.


Hooraaay! The Easter tree has been featured at A Jennuine Life, Suzy's Sitcom, Alderberry Hill and A Glimpse Inside. You've really made my day, thank you for the wonderful surprise! 

A Jennuine Life Thrifty to Nifty Thursdays Feature Suzys Artsy Craftsy Sitcom featured button 


Sunday, April 15, 2012

Happy Easter!


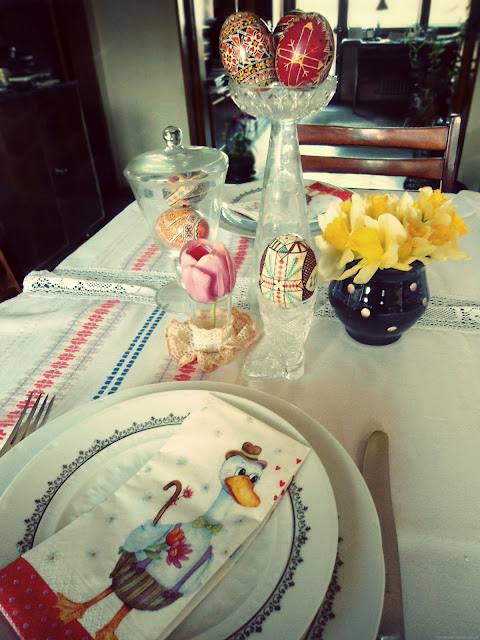
The Greeks, The Russians and The Romanians' religion is mainly Christian Orthodoxy and we celebrate Easter at a different time from the rest of the world. So today we've got a traditional Easter tablescape, featuring what you usually call Ukrainian eggs (but they are hand painted eggs right here in Romania, following a six century tradition that has now become the art of painting eggs).

To all my dear Romanian readers,
Hristos a inviat!


Pin It

Monday, March 19, 2012

DIY Easter Hat


Easter is very important in my country, so I wanted to decorate properly for the occasion. Browsing through a sea of (cuter than cute) adorable eggs and bunnies in pastel colors, I thought I should go the opposite way.

I chose the Easter Hat project because it's a reminder of a world-wide tradition. I ALWAYS wear something brand new for Easter (preferably shoes!!!). And looking in my closet, I went with the bowler hat. Too much pink never harmed any body, but it put me in the mood for a unisex look. I LOVE bower hats - British, quirky, stylish, timeless :)

You will need: a hat, a piece of fabric, glue, Easter felt silhouettes, flowers, paper and white gel pen.


Step 1: Cut a wide piece of fabric and secure it around the hat's original ribbon. Cover it completely.


Step 2: Attach the felt bunnies on the fabric piece.


Step 3: Prepare the flowers. Cut a thin piece of floral foam and immerse it in water. Pin the flowers on the narrow side. Wrap it up in waterproof foil.


Step 4: Secure the flowers to the fabric. Cover with another piece of fabric and finish with a felt bunny.


Step 5: Take a step back and evaluate your work. In my case, I felt the Easter Hat could use a little extra bling. Enter the awesome mustaches, in order to complete the British look!


Step 6: Take a sheet of black colored paper. Draw the mustache outline on the backside of the paper. Cut it, reverse and trace the outline with a white marker. I did it because you need to see the mustaches against the black hat. Attach some wire and pimp-up the Easter Hat :))


SO HERE IT IS :


Step 7: Frame it on the wall. Add a few drops of water every morning!


Pin It 

I've been featured at Homework and At The Picket Fence! Thank you, dear ladies, I feel honored!
                                                   homework  

LinkWithin

Related Posts Plugin for WordPress, Blogger...